|
|
Progress
during 2004 |
|
||
|
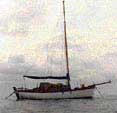
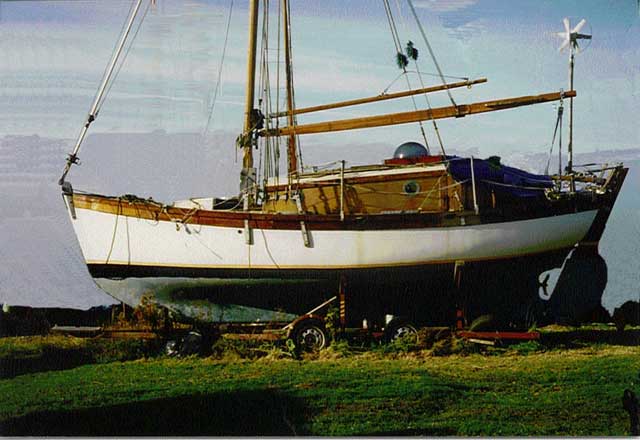
2004 Click on photos for a bigger picture. Click on browser 'back' button to return to main document.
|
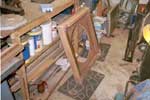
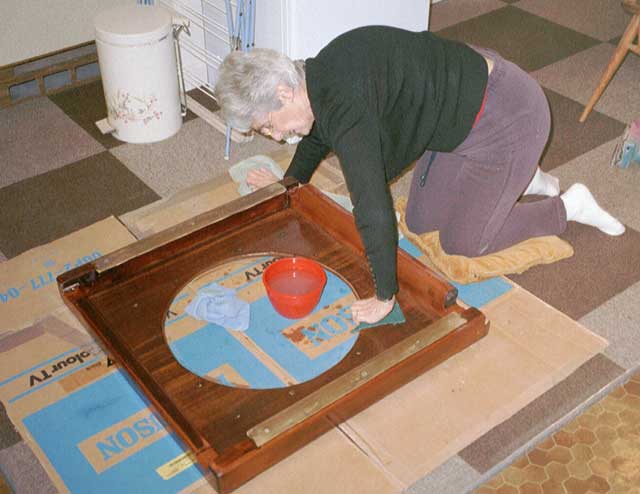
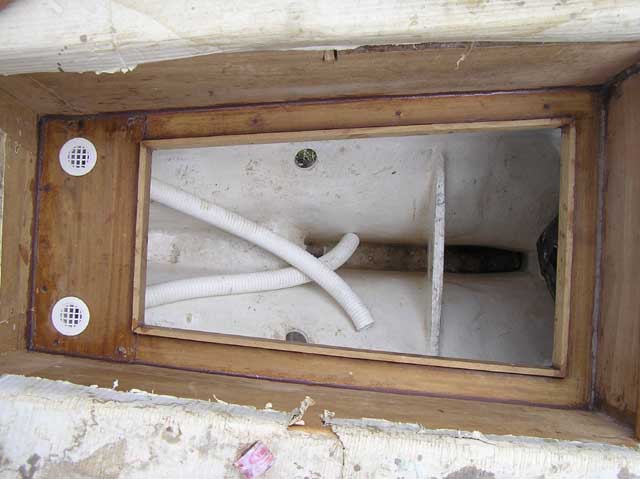
2004 Saturday 10th January Helped Peter and Jeff to modify Steve's boat for tests. At lunch time sailed with Peter in his Graduate, good to be on the water again, first time since early September, or was it the end of August. Fitted side trim pieces, rear starboard side of cabin. Sketched door design and measured basic sizes for doors. Did this to think about making toilet door. Made a mock-up Porta Potti to se if it would fit and if it would be ok to sit on. Tuesday 13th January Bought Porta Potti from Todds at Lostock Hall. Saturday 17th January Made the closing piece that fits on the cabin roof at the front of the hatch to seal it off, well help to prevent water ingress from waves, when closed. also made the hatch stop which fits on closing piece to help keep water out. I made the closing piece out of two pieces of 25 mm thick wood expoxied together. Sunday 18th January Put the refurbished hatch in place. Sue thinks it looks good. Carefully fitted hatch closing piece, decided not to glue it in place, wait until washboards fitted etc. Shaped the plywood make-up piece but not happy with it and marked it up for remaking. Cut out and shaped the piece of sapele that closed off the front Vee bunk. Glued and screwed it in place. Did some routing in the cabin, the two new vertical pillars in the back corners. Measured up toilet space and for Porta Potty floor. Wrote measurements on a piece of hardboard but then left it in boat. Managed to remember most of them and sketched them on clip board while Sue drove home. Friday 23rd January Glued a strips of sapele on to hatch closing make-up piece, decided that this would be better than making a new piece, sapele closed off the edges of the ply. Saturday 24th January Went for a smashing sail in David's Loch Broome Post Boat. Wind westerly force 4. Carefully fitted the plywood part of the hatch closing plate. Fitted the top step but didn't get round to making step supports. Measured for next step, using the 'template' that I made to check my measurements for the top step. Measured length of second step supports. Sunday 25th
January Started to seriously sort out design
of companionway/engine cover. Monday 26th, Tuesday 27th & Wednesday 28th January Continued trying to sort out design. Made proper drawing 2.5:1 scale. Thursday 29th January Cut out second step for cockpit. Cut out playwood for step risers. Agonised over depth, drawing conflicted with some of measurements on sketches. Made vertical supports for second step,
i.e. planed the angle of the cockpit sides on them Sunday 1st February Fitted bottom step, top step supports. Took several measurements of engine and engine bearer supports Wednesday 4th February Cut out top step, engine compartment sides, top step riser and top step edge piece. Thursday 5th February Measured bottom plate, front of engine cover/bottom of companionway. Saturday 14th February Planned/Designed split between bottom and top removeable pieces of companionway. Monday 15th February More detail design of joint. Wednesday 18th February Cut out lots of pieces of companionway. Friday 20th February Took more measurements and starteed planning washboards and retaining pieces. Wednesday 25th February Carried on with engine cover/companionway. Fitted bottom retaining piece, then top retaining piece and then side pieces. Cut top piece and refitted to removeable panel. So far so good. Routed radius on outside of fixed pieces. Saturday 28th February Machined steps. Sunday 29th February Fitted vertical closing pieces for entrance and bottom piece at step. Fitted support pieces to underside of top step. Stripped all work to take home and glue up. Measured up for quarter berth edging. Marked out for steps. Monday 1st March Cut out steps and supports. Shaped top step. Tuesday 2nd March Glued bottom and sides and top step. Cut out plywood backing pieces for companionway and screwed to covers. Wednesday 3rd March Sandpapered all bits of companionway (raining). Positioned steps of top cover and drilled. Thursday 4th March Asembled engine cover/companionway top and bottom pieces. Ground top of screws off. Cut limber holes and cut out 4" plank. Filled upright saw cut. Friday 5th March Cut pieces for left hand side of engine cover/quarter berth. Tidied up filled bits. Sunday 7th
March Measured up cabin entrance more accurately. Tuesday 9th March Measured
up engine starter panel to design
cut out to fit. Thursday 11th March Measured up plywood for washboards. Friday 12th
March Cut out plywood for washboards and
machined iroko retaining strips Tuesday 16th March Glued inside side washboard retaining pieces. Glued top step/washboard riser sapele piece. Glued top panel in (panel below above riser to inside top step). Glued removeable bottom companionway retaining pieces. Machined bottom removeable companionway to fit properly. Glued
quarter berth cushion retaining piece in place. Thursday 18th
March Removed entrance step an all bits
and cleaned up and epoxied in place. Friday 19th
March Fitted
brass locking bolts to top removeable engine cover/companionway. Saturday 20th March Fitted iroko washboard retainers and screwed into place. Can't glue them in until I've fixed the outside top step, whicch I'm levinf for he moment because I may need to remove this step to lift engine out, it'll be easier than when it's fixed in place. Cut wasboard into two halves with sloping cut. Fitted top washboard, i.e. cut down to size, I'd purposely made it higher to allow for cloping cut and accurate matching to hatch. Filled holes in cabin sides. Sorted out top engine cover/companionway
retainer piece. Sunday 21st
March Filled more holes in cabin
sides. Tuesday 23rd March Bought U-bolt for hatch locking mechanism. Made hatch locking plate for washboard. Wednesday 24th March Cut out filling strips for main cabin front deck/cabin front riser beam and fitted. Fitted hatch U-bolt and washboard plate. Designed cockpit sole and cover. Thursday 25th
March Made list of jobs to do: Various bits of trim in main cabin Front seal on hatch/roof Fit
Vents Grab
rails Engine: Clean rust of pulley Check all round clearances & estimate modifications necessary Wiring Fuel inlet Oil filter Check/tighten all mounting bolts and fastenings Measure length of fuel lines Fittings for fuel lines Position gear lever/throttle Cut out and fit Measure length of control cables for gear lever/throttle Cockpit sole Clean hull and fit cockpit drain skin fittings Fit top piece and seal cockpit drain fittings Chart table Fix back Fix sides Friday 26th March Cleaned up beam Cut and fitted trim to chart table/sink Cut out and shaped engine cover trim, vertical Cut out and shaped bunk/engine cover
closing angle Saturday 27th March Cut, shaped and glued top starboard side engine cover trim Cut, shaped and glued vertical starboard side engine cover trim Cut, shaped and glued closing piece between bunk and starboard side engine cover Cut, shaped and glued vertical piece of ply between bunk and starboard side engine cover Cut, shaped and glued vertical front starboard side engine cover trim Cut, shaped and glued horizontal continuation piece on starboard side of bottom removeable engine cover Cut, shaped and glued top engine cover retaining strip to top of bottom cover Cut, shaped and glued to top cover the
strip that protects botton cover groove from dirt etc. Sunday 28th March Routed and fitted top of top washboard closing piece Toilet 'holes' - cleaned up starboard side Plugged front cabind beam screw holes Fitted front of hatch closing piece
but did not fix Saturday 3rd
April Fitted sealing piece between hatch
and cabin roof Sunday 4th April Fitted 'trim' piece to front starboard corner of cabin side - to cover repair to cabin side. Similarly fitted 'trim' piece to port side front and rear corners. Fitted side corners on cabin side above chart table Fitted trim to outer toilet bulkhead to cabin roof Marked out perspex washboards Sorted out what needs doing to bulkhead
trim between sink and cooker Thursday 20th
May Priority Jobs: Paint rear wooden board Secondary Jobs: Engine control lever
|
2004 Click on photos for a bigger picture. Click on browser 'back' button to return to main document. |
||
|
|
Tuesday
22nd June Removed dinghy from bow to facilitate Alex
cleaning underside of hull Monday
5th July Sunday 11th July Friday
16th July Then called at CPC and bought a module encloure, a couple of circuit breakers and a 25A RCD, as instructed by Stevee Lee my electrical guru. Fitted the cockpit hatch. Shaped the rear rubbing strake/trim pieces. Checked closing piece. Monday
19th July Checked postion for bilge pump. Cut out bulkhead?
I'm writing this in May 2005 so a lot of my notes don't make
sense now! Work on the boat was interrupted by several 'medical complaints' to me. In May I had a new set of partial dentures fitted, which take time and pain to settle in so I didn't feel much like working. Then I got housemaid's knee. This was supplemented by almost cutting the end of my left index finger, which made using tools difficult. Then I banged my left shin whilst sailing with Paul in his 505. Hurt at time but forgot about it in minutes but later my shin swelled up, then my ankle. However I was determined to go on the Family Cruise and Linda said my leg would be ok. The Family Cruise is written up elsewhere but I'll just mention that my toes went black and I paid a precautionary visit to the hospital outside Bangor. |
|||
| Tamarisk Home Page |
|
|||